This is what I learned from App Router: Mutating Data. The diagrams greatly helped me understand the CRUD operations better.

In this section, I explored
- C: create✨
- U: update♻️
- D: delete🧹
💻Server Function
Before diving into the details, it’s important to understand that Next.js has 2 types of components:
- client component
- server component

Since the C, U, D all interact with the database, they are implemented as server function. There are 2 patterns to define a server function in Next.js.
1️⃣ mark the function
import Button from './Button';
function EmptyNote () {
async function createNoteAction() {
// Server Function
'use server'; //👈this directive marks this function as server function
await db.notes.create();
}
return <Button onClick={createNoteAction}/>;
}2️⃣ mark the file
Alternatively, you can create a file like actions.ts and add the directive 'use server' at the top,
'use server';
export async function createInvoice(formData: FormData) {}
export async function updateInvoice(id: string, formData: FormData) {}
export async function deleteInvoice(id: string) {}all functions in this file will be server functions. This approach keeps all server functions organized in a single file, which is a great way to maintain clarity. 👍
🗂️Schema
The data submitted through forms is FormData. To ensure proper type validation, for example a number twelve is 12 but not "12", we use Zod to define and validate the schema.
const FormSchema = z.object({
id: z.string(),
customerId: z.string(),
amount: z.coerce.number(),
status: z.enum(['pending', 'paid']),
date: z.string(),
});✨Create
Let’s examine the “Create” workflow.
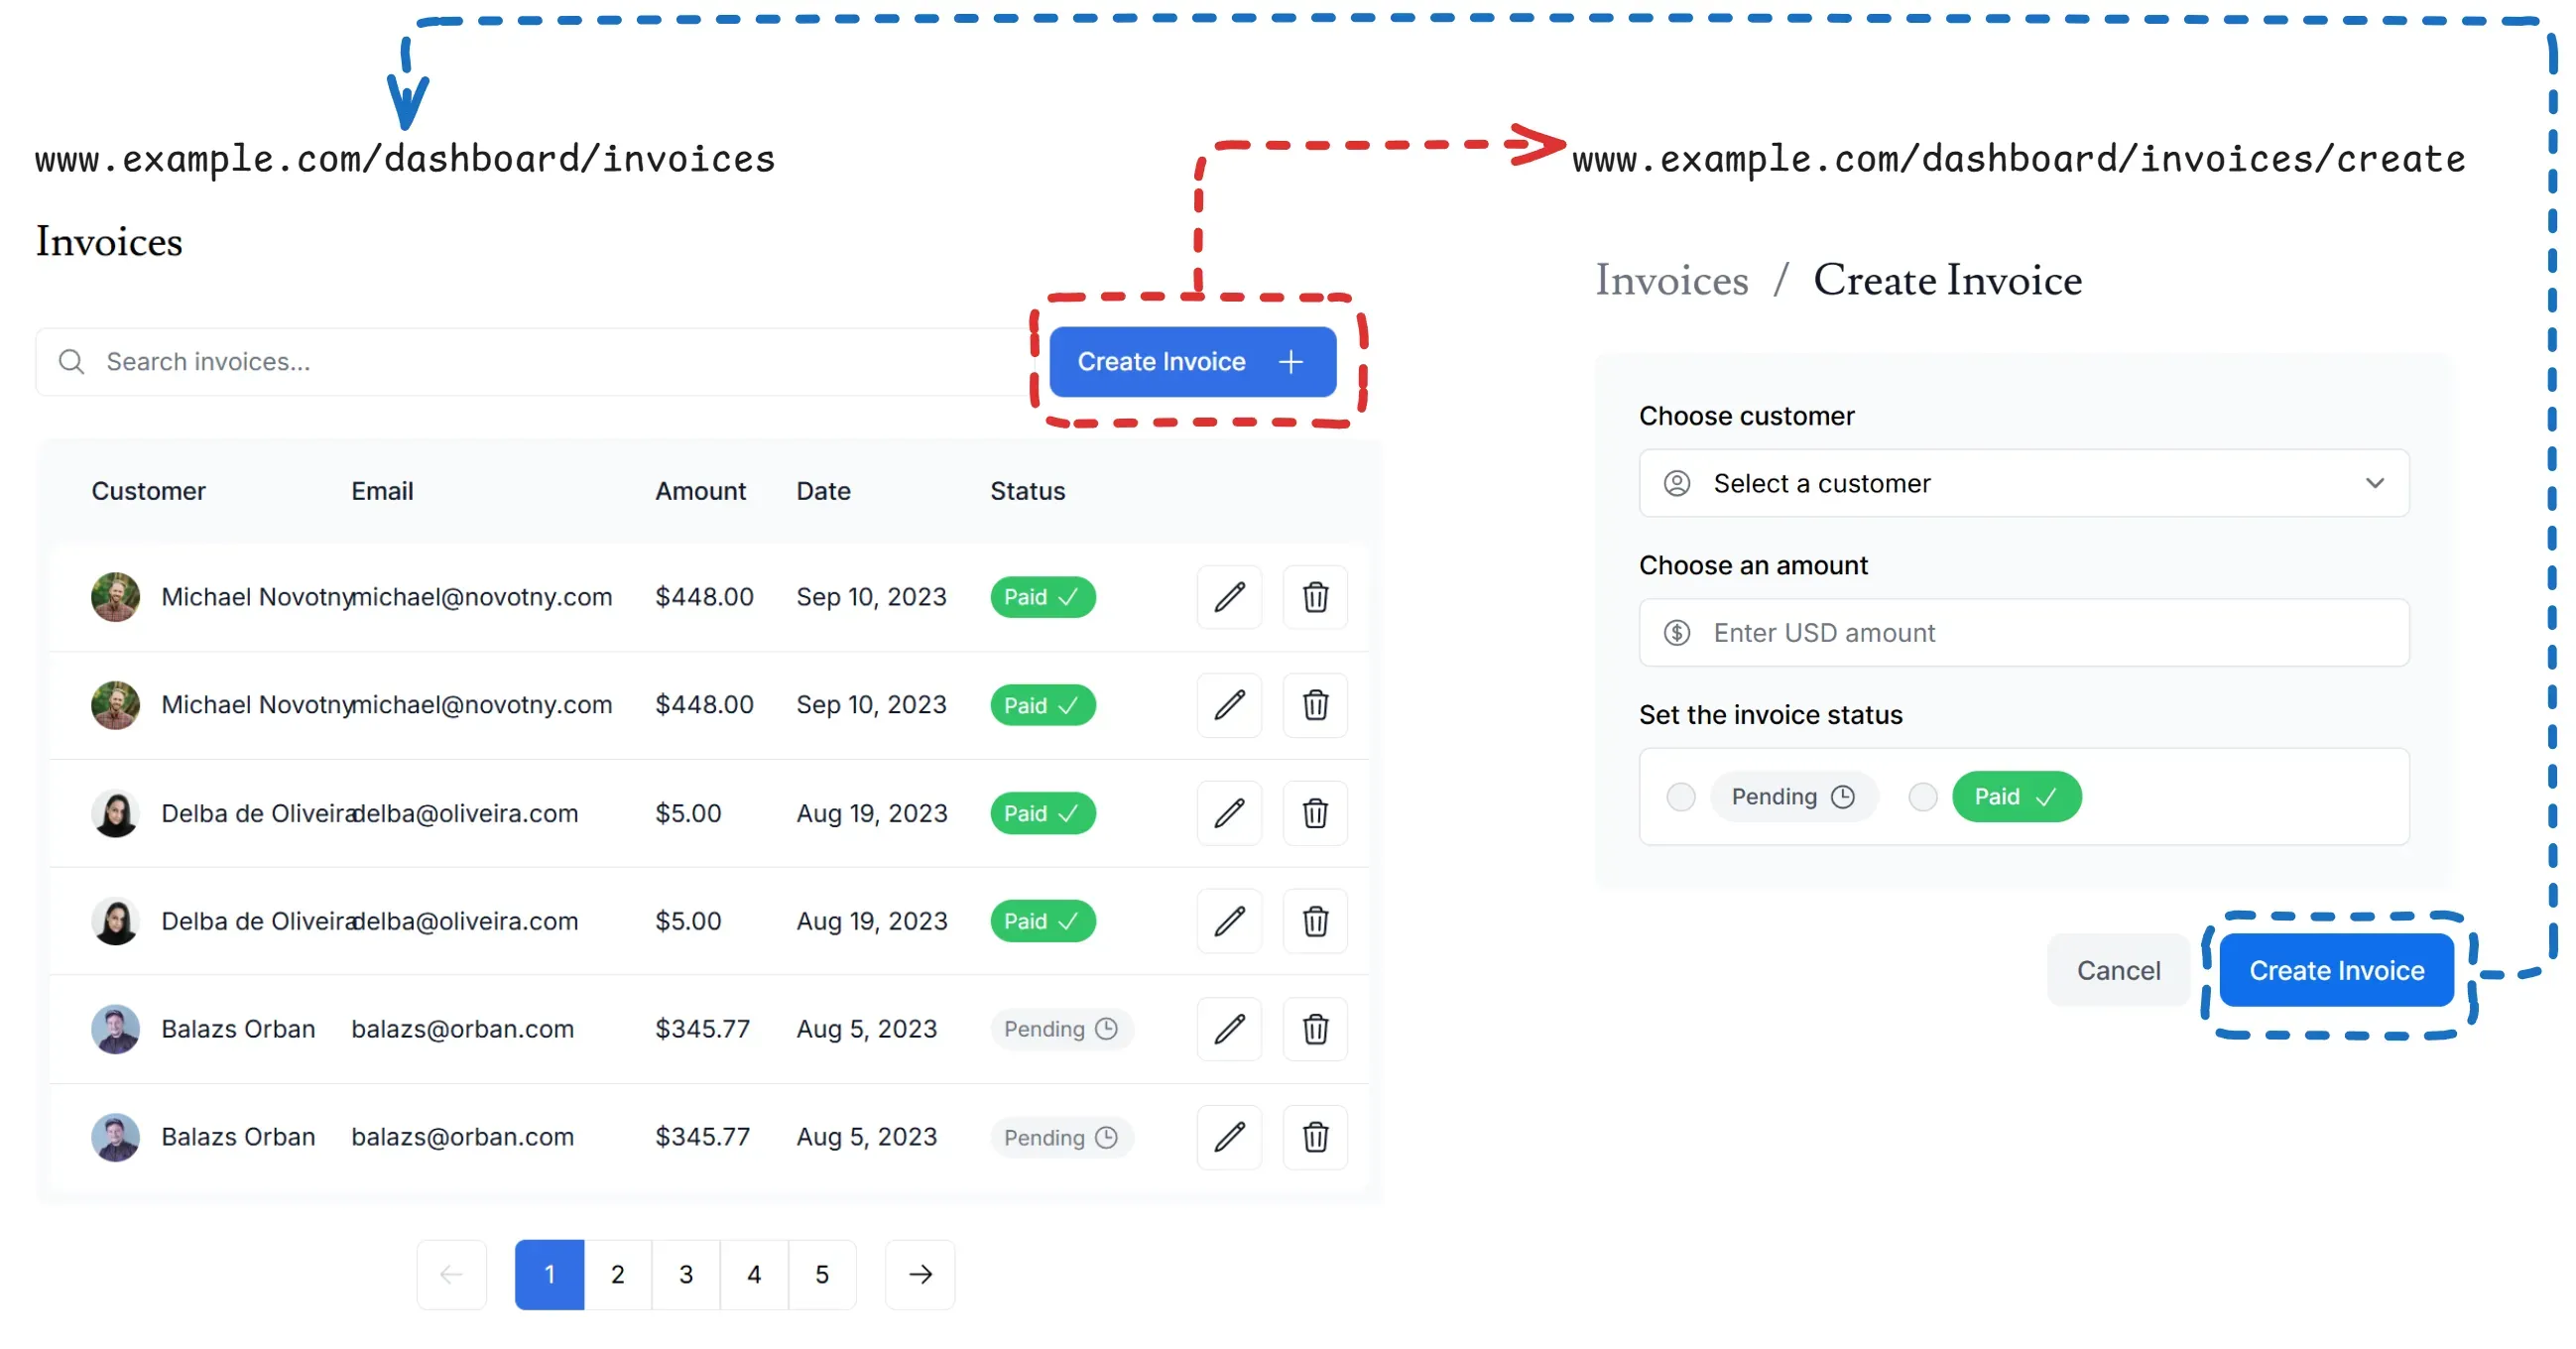
There are 2 main routes:
- 🟥User clicks the “Create Invoice” button, they are navigated to
...com/dashboard/invoices/create - 🟦After the form is filled out and submitted to the database, the user is redirected back to
...com/dashboard/invoices
The first route is straightforward, using a <Link/> component to navigate. I am particularly interested in the second one:
- how do we ensure the data is fresh when returning to the
...com/dashboard/invoices - how do we go back to
...com/dashboard/invoices
The answer lies in the server function createInvoice() which is bound to the form.
<form action={createInvoice}>
//all the data wrapped in FormData
</form>When user clicks the “Create Invoice” button in 🟦, this server function will:
- parse the form data
- execute the sql code to insert the data into the database
revalidatePath()will “refresh” the table, ensuring it displays the latestredirect()will navigate back to the invoices page
export async function createInvoice(formData: FormData) {
//parse FormData
//..
//SQL
await sql`...`;
revalidatePath('/dashboard/invoices');
redirect('/dashboard/invoices');
}♻️Update

The “Update” workflow is quite similar.
export async function updateInvoice(id: string, formData: FormData) {
//parse FormData
//..
//SQL
await sql`...`;
revalidatePath('/dashboard/invoices');
redirect('/dashboard/invoices');
}One key aspect to highlight is Dynamic Routes. The invoice UUID c6a48b88-67b8-4747-8fb1-295aa1074a58 is dynamic and only known at runtime. To handle this, we use the following file structure.
- 📂invoice
    - 📂[id]
        - 📂edit
            - 📄page.tsx
This structure results in a URL like ..com/dashboard/invoices/[id]/edit
🧹Delete
The “Delete” workflow follows a similar pattern, but there is an important consideration common to all Create/Update/Delete operations.
The following approach is not safe.
import { updateInvoice } from '@/app/lib/actions';
export function DeleteInvoice({ id }: { id: string }) {
return (
<form action={deleteInvoice(id)}>
//...
</form>
);
}Since the Create/Update/Delete buttons are all client component, passing the id directly exposes it in the client-side code, which is dangerous💀!
Instead, use the bind() to securely pass the id to the server function:
import { updateInvoice } from '@/app/lib/actions';
export function DeleteInvoice({ id }: { id: string }) {
const deleteInvoiceWithId = deleteInvoice.bind(null, id);
return (
<form action={deleteInvoiceWithId}>
//...
</form>
);
}Using bind() ensures the id is safely encoded and not exposed in the client-side HTML.